Showing posts with label mod. Show all posts

Saturday, August 22, 2015

Retr0brite Is Just Hydrogen Peroxide Plus Filler

I bought an SNES Mini on eBay the other day with the intention of applying an RGB restoration mod + csync. It was in decent condition other than a few scuffs and some extensive yellowing of the plastic, which I decided to try correcting with some "Retr0brite."

After reading up on recipes and some related forum posts, I decided not to go through the trouble/expense of buying and mixing up actual Retr0brite paste, which contains glycerin and xanthan gum, and instead focused on the active ingredient: concentrated hydrogen peroxide. Recipes typically call for some low-concentration, aqueous hydrogen peroxide, like you find in the big brown bottles, bolstered with OxyClean--basically dehydrated hydrogen peroxide powder--and thickeners to make a paste that you can spread onto things. This in mind, it doesn't make much sense to use relatively expensive low-concentration hydrogen peroxide as a base when you could just start with regular water and add more OxyClean...

If you have access to a Sally Beauty Supply store, they sell bottles of 40 vol creme developer, which has an even higher concentration of hydrogen peroxide than OxyClean and is already goopy, so you don't need to fool with the glycerin/xanthan gum to get it to stick to stuff. This can be helpful if you don't have an appropriately sized container in which to submerge your plastic, and reports suggest that it works within hours rather than days. However, you need to be more cautious with this, as it can damage clothing and skin/hair.

Anyway, I skipped the low-concentration stuff and just dumped a bunch of OxyClean into a roasting pan full of water, plopped the top section of my SNES Mini in and left the whole thing out in the sun for 2 days (you'll have to replenish the OxyClean periodically, as it seems to lose its mojo over time).

The first day, I didn't put nearly enough OxyClean in, so there was very little improvement. The second day, I drastically increased the concentration and had much better results. I found that, in a properly high concentration, the plastic should be more buoyant than the solution, so you'll need to hold it down with something. Also, there seems to be some disagreement as to whether the process needs actual sunlight or if any light source will do. In my case, there was no effect from 8 hrs under a CFL light bulb, so the sunlight (or a UV lamp) seems to be necessary.
Before
After
It's not perfect, but it's a pretty dramatic improvement, I think. The RGB+csync mod was a success, as well! The resulting picture is noticeably sharper than on my older model (the model with the sticker underneath the power button) and there's no annoying bright vertical line going through the center of the screen. The colors are identical to the original model because I put 1.1k ohm resistors on each line to dim the channels. The tutorial I linked above mentions this as an optional step and I highly recommend it.

Sunday, July 15, 2012

SFxT: How to Duplicate A Character - Proof of Concept

There are a lot of reasons why you might want to duplicate a character in SFxT, the most obvious (to me) being that you would like to play a team that consists of 2 copies of a single character that you are most skilled with. To accomplish this task, we need to edit a few files and make copies and rename a bunch of others, so lets get some tools together first.

As usual, you'll need piecemontee's Asset Explorer (aka SF4Viewer) and a text editor (I recommend Notepad++; regular Notepad WILL NOT WORK). You'll also probably want a bulk renaming utility, such as the aptly named Bulk Rename Utility. You should also take this opportunity to make backups of any files we plan to edit, as mistakes can render your game unplayable. Repeat: MAKE BACKUPS BEFORE TRYING ANY OF THIS.

NOTE: this is currently a proof of concept. The duplicate character will only work in training mode unless we duplicate more files, which I'll add to the post if/when I track them all down. Fights with intro animations will crash. See the bottom of the post for Robhal's update! Also, duplicating characters will corrupt your save data, so be sure to back that up first.

STEP 1 - Creating our duplicate

The first step to duplicating a character is to make a copy of the target's character folder. For this tutorial, I'll be using Ken as an example. So, navigate to [install dir]\resource\CMN\battle\chara, right-click on the desired character folder, select copy, then right-click elsewhere in the directory and choose 'paste.' You should end up with a folder named '*** - copy.'


Next, rename that folder to a non-conflicting 3-letter prefix that will represent your new character duplicate. In my case, I'm going to use 'KE2.' Note: you must use exactly 3 letters for your prefix or the game will fail to even load.

Once that's done, navigate into your new folder and open your bulk renaming utility. Select all of your files in the folder and rename all of them to match your 3-letter prefix (that is, all of the KEN* files should be renamed to KE2*), then do the same for all of the files in the 'sound' folder (these steps will be different depending on which renaming utility you use, so I'm not going to go over it here).

It should end up looking like this:


Now, we'll need to make duplicate call sounds (*_CAL_*) for each character we expect to partner our duplicate with. For the sake of simplicity, I'm only going to partner KE2 with regular ol' KEN, but if you wanted to be able to partner him/her with any other character, you would need to make calls in each potential partner's 'sound' directory. So, navigate to his folder, go into 'sound' and then make a copy of his *_CAL_KEN_E and ...J files. Rename them to match your duplicate prefex, like this:


Note: Failure to create the proper calls in each partner's sound folder will result in a game crash. (It's interesting that Capcom has these duplicate calls in the first place, suggesting that single-character teams were a possibility at some point).

Ok, with that done, we're ready to move on to step 2.

STEP 2 - Telling the game about our duplicate

SFxT keeps track of the available characters and what to think about them in the const.lua file, located in the [install dir]\resource\CMN\boot\game directory. Make a copy of the file and move it to a directory where you have write permissions, such as your desktop.

Then, open the file in your text editor and you should see a section labeled "charas" at the top of the file. Navigate down to the subsection for your duplicated character (in my case, Ken) and copy everything from his/her subsection, starting with the open-curly-braces (this thing: { ) and ending with close-curly-braces-followed-by-a-comma (this part: }, ).


Now, paste that in (right after the original is fine) and change the first line, labeled "['code']" to your duplicate's code (in my case, KE2). You can change the name here, too, but I don't think it really matters. While we're here, you can also modify anything else you want, such as vitality, "official partner," default voice, etc.

Save the file and replace the original (make a backup first, if you haven't already). Now we're ready for step 3.

STEP 3 - Creating a character select slot

SFxT determines which character slots are available through the selector_layout.emz file, located in the [install dir]\resource\CMN\ui\pre_battle directory. However, if you try to open the file directly, you'll see just a bunch of gibberish because the file is compressed. To decompress it, just open piecemontee's Asset Explorer and drag the file into the left-hand window pane. It will automatically create a backup of the original file (called selector_layout.emz.compressed) in the same directory, which is convenient. Once that is done, open the now-decompressed file in your text editor and it should look something like this:


This grid represents the character select icon grid, and we can use this file to move characters around (in case you want your favorite character to be closer to the top, for instance) or create new slots altogether by overwriting blanks (#BL). You can also remove characters by replacing them with blanks.

As you can see in the above pic, I have already replaced one of the blanks with my duplicated character abbreviation, to the left of the Random Select box. Note: Make sure you place it somewhere adjacent to an existing character or else you won't be able to move the cursor to it (i.e., the far corners are not good spots).

Once you're finished making changes, save the file and replace the original, making sure to back it up first, if you haven't already.

Now we're ready to launch our game. If all goes well, you should see a new character select slot on the character select screen (to the left of the Random box, just as we stipulated in our text file), which is treated as an entirely new character as far as double-picking is concerned:


Some Current Unknowns

First, I don't know how the game determines which character portrait goes into the character select screen, which is why our dupe has a blank box. Second, I don't know why the duped character is positioned strangely when you select him/her (my KE2 always appears hanging off the screen if I select him first for some reason).

If you figure out anything cool, please leave a comment.

Have fun, share your work and ALWAYS MAKE BACKUPS.

UPDATE - Robhal figured out the missing files to make the duplicated characters usable in vs. and story modes:

And now these my instructions below are continuation from hunterk's method above, to be able to play the duplicated character in Arcade and Versus mode.
1. Go to folder "\Street Fighter X Tekken\stream\CMN\battle\chara", right-click on the desired character folder, select copy, then right-click elsewhere in the directory and choose 'paste.' You should end up with a folder named '*** - copy.' Next, rename that folder to a non-conflicting 3-letter prefix that will represent your new character duplicate. In this case, 'KE2'. Then navigate into the new folder and rename all the files (just two files) to match your 3-letter prefix (that is, all of the KEN* files should be renamed to KE2*).

2. Go to folder "\Street Fighter X Tekken\resource\CMN\ui\battle\comment\cmt", copy the desired character file (in here, KEN.cmt) and rename it to 'KE2.cmt'. OPTIONAL: You may also move the file 'KE2.cmt' to folder "\Street Fighter X Tekken\patch\CMN\ui\battle\comment\cmt" for easier maintenance.

3. Go to folder "\Street Fighter X Tekken\resource\ENG\ui\battle\comment", copy the desired character file (in here, KEN.m4s) and rename it to 'KE2.m4s'. OPTIONAL: You may also move the file 'KE2.m4s' to folder "\Street Fighter X Tekken\patch\ENG\ui\battle\comment" for easier maintenance.

4.Go to folder "\Street Fighter X Tekken\resource\ENG\ui\battle\subtitle", copy the desired character file (in here, KEN.m4s) and rename it to 'KE2.m4s'. OPTIONAL: You may also move the file 'KE2.m4s' to folder "\Street Fighter X Tekken\patch\ENG\ui\battle\subtitle" for easier maintenance.

SOME ISSUE TO NOTICED:
1. In any battle, when the duplicated character use the Cross Rush (ABC Launcher), he/she still has that zoom-in camera animation.
2. In battle with intro, the duplicated character has a weird subtitle. And in the winning screen, the duplicated character has a blank comment.
3. You can't view the quickcombo preview, the trial, and the command list of the duplicated character, otherwise it will fall back to title screen.
4. When you play the Arcade mode, make sure you pick the duplicated character as 2nd character (tag partner). The reason is if you pick the duplicated character as 1st character and when you defeat the final boss (either Akuma or Ogre), after the credit screen, it will fall back to title screen. --> (I haven't found the solution to this issue yet)

Friday, May 11, 2012

Beginner's Guide to Custom Colors in SFxT


Update: The steps from this tutorial have been automated. You can now do all of it easily from sloth86's EMMEdit tool.

Street Fighter x Tekken handles colors in a completely different way from Street Fighter 4 and its derivatives as a result of the color customization feature. Instead of just pulling colors and textures directly from the texture image, the textures look like this:
and the game calculates the appropriate color based on a series of numbers, which represent a color mix from the texture image's color channels. These numbers are stored in the *.obj.emm files--specifically the 'MatCol' attributes--alongside the various other object materials and material attributes.

There are two main ways to edit *.obj.emm files, manually via hex or using NanjouJ's MatEdit tool, which is a little more user-friendly than fiddling with hex codes. In this tutorial, we'll be using MatEdit to copy colors from another color file, rather than calculating the color from scratch. If you would like to calculate an entirely new color from scratch, this post from yajirobe does a good job of explaining it.

So, first thing, we need to make backups of any of the files we plan to mess with. Once you've done that, go download MatEdit from the AE wiki's 'tools' page and identify which files you want to work with. I'm going to be copying a color from one of Ryu's *.obj.emm files into one of Poison's.

Now, create a new folder (on your desktop or wherever) and copy matedit.exe and both Ryu and Poison's *.obj.emm files into it. Then, hold ctrl+shift on your keyboard and right-click somewhere inside that folder, and choose 'Open command window here':

 This will open a command line window, but don't freak out. I'm going to tell you exactly what to type in.

First thing, we want to export the materials from both of our files, using the syntax "matedit.exe export [target obj.emm file] [newfile.txt]." So, in my case, I'm going to type (replace PSN/RYU and poison/ryu as appropriate for your files):
matedit.exe export PSN_01_01.obj.emm poison.txt
and
matedit.exe export RYU_01_01.obj.emm ryu.txt
If done correctly, you should have two new files in your directory, in my case, poison.txt and ryu.txt. At this point, we're done with the command line for now, but don't close it yet because we're going to need it again later.

For now, open both files in the text editor of your choice. Notepad works, but I prefer Notepad++ (it's free and awesome; go get it).

Open both of the txt files in your text editor. You'll see a series of sections which correspond to the various objects that make up the character's model. In each section, there are a bunch of variables and values that tell the game how to render each object. The ones we're worried about today are the MatCol variables:
 You'll notice that I highlighted just the *R, *G and *B MatCols, which correspond to the red, green and blue color channels, respectively, and not the *A MatCol, which corresponds to the Alpha channel. You shouldn't mess with the alpha value if you're just trying to change colors. ;)

So, lets say we want to take the color of Ryu's pants--i.e., white--and copy it over to Poison's hair. To do this, we would hop over to our ryu.txt file and search for 'pants.' Then, scroll down through his 'pants' section until we find the MatCol subsection.
 In this case, I only have a single color, MatCol0 to choose from, but some models will have multiple color groups, such as MatCol1 and MatCol2. These MatCols represent the color groups that can be customized in-game, so make sure you're choosing the correct one.

Copy those values and then switch over the poison.txt file and search for 'hair.' Scroll down to the MatCol section and replace the values there with your new, copied values:
 Great, we're almost done.

The last step is to import the modified text files back into the target *.obj.emm file. So, back to your command line window (if you didn't listen earlier and closed it, just open a new one) and type:
matedit.exe import poison.txt PSN_01_01.obj.emm
Now you're ready to test it out. Copy the PSN_01_01.obj.emm file into your [install directory]\resource\CMN\battle\chara\PSN folder, overwriting the one that was there (you made a backup, right??) and go check it out.

If you had calculated a new color from scratch using yajirobe's instructions instead of copying the color from some other costume, you would go through the exact same steps, only using your calculated color numbers instead of the ones from Ryu's pants.

That's it. Have fun, share your work and always make backups.

Monday, March 12, 2012

Beginner's Guide to Custom Challenges using Waterine's ClgEditor


This tutorial will cover the very basics of using Waterine's ClgEditor tool to create your own combo challenges for SSF4AE. For this, we will need the ClgEditor and Dantarion et al's Ono! Editor.

When you first run the ClgEditor, click the button to 'Open...' and browse to your installation directory (usually C:\Program Files (x86)\Steam\steamapps\common\super street fighter iv - arcade edition), then go to ...\resource\battle\chara and go into the folder for the character whose Trial Mode you wish to modify. It should filter the folder contents such that the only file displayed is our desired CLG file, in my case, CMY.clg.


Once the file is loaded, you can see the list of challenge levels on the left. At the top of the window you should see a pulldown menu labeled 'Ultra Selection,' which lets you select which Ultra combo should be loaded for the challenge, and another pulldown labeled 'Target State,' which determines how the dummy (Dan) should act (for use with situational combos, like ones that must start with a counterhit or only work on jumping opponents).

The area underneath those pulldowns is where most of the fun happens.

In the 'Scripts' section, the first button from the left (looks like a sun) creates a new command, either an 'attack' or a 'script,' which you can choose between using the 'Criteria type' pulldown menu to the right. Attacks are just your normal actions while scripts are movement actions, like dashes and FADCs.

The 'Criteria indices' field tells the game which moves it should accept as a successful command. If any strength of a move will do, as is the case with many of the early challenges, you must include each index that fulfills the criteria. For a regular special move (light, medium, hard and EX), you would need entries for all four strengths.

Back in the scripts window, each command represents one discreet portion of a challenge, and you can show up to 8 on the screen. You can go beyond 8 in the list, but unfortunately the display doesn't scroll in-game, so the player won't be able to see the rest.

To the right, you can choose what on-screen instructions and input help to display from the respective pulldown menus.

So, lets say I want to change Cammy's first challenge from a simple Spiral Arrow to a Cannon Spike > FADC > EX Cannon Spike.

Step 1. Select the first trial from the levels list and hit the 'X' button under Scripts to delete the existing command. Then, click the sun button to create a new command. Our first command--Cannon Spike--is an attack, so choose that from the Criteria type pulldown.

Step 2. Next, we need to fill in the Criteria indices field with the indices for the move (I cheated and stole them from Challenge #3), in this case, 100, 101, 102, 103, 104, 105.

Step 3. Under 'On-screen command text's last pulldown menu, we want to select Cannon Spike, and under 'Help menu command text's last pulldown menu, we want to select Cannon Spike Input.

Great! There's our first command. Now, we need to make another.

Step 4. Click on the sun button again, but this time we're going to use a movement script, so select 'Script' from the Criteria type pulldown.

As in step 2, fill in the Criteria indices field with the appropriate inputs, in this case 325 (I stole that from a later challenge, as well; are you seeing a pattern here?).

Likewise, we'll fill in the On-screen command text and Help menu command text, which are a little weird for FADCs: in the first pulldown under On-screen commant text, choose 'EX,' and under the third pulldown, choose 'FocusCancel.' Then, under Help menu's first pulldown, choose 'EX' again, and under the third, choose 'MP+MK.'

Step 5. Alright, moving right along, click the sun button one more time and choose the 'Attack' criteria. Up until now, all of the moves we've wanted to use could be easily pilfered from other challenges. However, no challenge requires an EX Cannon Spike specifically, so we'll have to figure this one out on our own. To do it, open up the Ono! Editor and open Cammy's BCM file. You should see a window that looks something like this:

Click on the bottom button, labeled "Hitbox Table." It should open a new window that looks something like this:


There's a lot of really great information available in this window, but we really only need the numbers on the far left in front of the move names. So, scroll down until you find your desired move, in my case EX Cannon Spike, which is listed under #106 and #107. If the criteria type is an attack, you use the hitbox data number, if it's a script, you should use the script number (you can expand the header info in Ono! to see it).

Now, enter those numbers into the Criteria indices field, separated by commas and spaces as necessary.

Fill in the appropriate on-screen command and help menu text, and you should be all set. Click the save button and lets go check it out by copying it into our ...\resource\battle\chara\CMY folder (don't forget to make a backup!!).


Now, as a note, you can make your combos against any version of the characters' movesets you like (Super is the default, of course, but you can use movesets from AE, 2012 or even custom movesets created in Ono!), you just have to copy the appropriate BAC/BCM files into the ...\resource\battle\chara\*** folder to overwrite the ones that are already there.

If you create something cool, be sure to share your work with the community, and always always always make backups!

Wednesday, October 5, 2011

Using sloth86's Ambient Occlusion Tools in SF4

In the course of making skins for SF4, you might have toggled off an unwanted model, such as Chun Li's spiked bracelets, only to find an unsightly darkening, similar to a shadow, where the object used to be. This darkening is part of what's known as an "ambient occlusion (AO) map," which is used by the game to fake some self-shadowing by the models and thus reduce the amount of shadows your computer needs to draw dynamically to look realistic. However, once the offending model is gone, the AO isn't really appropriate anymore, so we need to do something about it.

For this tutorial, you'll need to download some of sloth86's tools: AOExtractor, AOInject and EMG Swapper, as well as piecemontee's Asset Explorer (aka, SF4Viewer). You'll also need a paint program that can view/edit EPS files, such as Photoshop. UPDATE (6/20/2012): the links for sloth86's tools are dead. You can now get the AO tools here and the EMG Swapper here.

Once you have your tools, open your desired costume file (*.obj.emo) in the Asset Explorer. I'm going to be using Chun Li's default costume (CNL_01.obj.emo):


As you can see in the picture above, I've already toggled off her 'Ring' model, which has left the visible AO darkening on her 'Skin_arm' model, which I intend to fix.

So, next we'll want to select that darkened model, right-click and choose 'raw dump' to get the raw EMG model. Name it something informative with the .emg file extension and click 'save.'

While we're here, take note of which EMG model we're extracting, counting from the top. For me, it's the 10th one. We'll need this information later, so write it down or something.

Next, open the AOExtract tool. You should see a window like this pop up:


In the first field, put in whatever you just saved your dumped model as. In my case, 'skin_arm.emg.' The other options can be left at the default values, unless you just feel like changing them. (Subdividing triangles will make your EPS file look a little nicer, but it takes longer and is unnecessary)

Click 'Extract' and you should end up with a new file, in my case 'new.eps.'

Open your new EPS file in Photoshop and you should see something like this:


Those triangles you see correspond to the triangles used to make the model (just like the UV map, if you're familiar with those). As you can see, some of them are particularly dark, while others are lighter, just like we saw in the Asset Explorer window.

So, using the dropper tool, pick a medium color (we don't want a dark shadow, but we don't want it all bright like a highlight, either). If you're familiar with using hex color values, EFEFEF is a pretty good, generic match.

Once you have your color, you can either use the paint bucket tool to change each triangle by hand, or you can just paint over the whole thing, like I did.

Once you're all finished, we need to 'Save As...' and choose the bitmap (BMP) format, with OS/2 compatibility, 24-bit and no compression.

Next, open the AOInject tool. You should see a window like this:


In the first field, enter the name of your dumped EMG model, in my case, skin_arm.emg. In the second field  enter the name of our modified, blank AO map, in .bmp format. The third field can keep its default value.

Click 'Go' and you should be left with a new EMG model that we can view in the Asset Explorer:


As the pic shows, it's all one uniform gray color, instead of having light and dark areas.

Great!

However, now we need to actually get this unshadowed model back into our character model. For this, we turn to the EMG Swapper tool.


Open it up and you should see a window like this:


In the first field, enter the name of the character model you're working with, in my case, CNL_01.obj.emo. In the second field, enter the number of the model we're replacing (remember the thing we wrote down earlier??), in my case it's number 10. In the third field, enter the name of your modified model (the one we injected the new AO map into), in my case 'blank.emg.' The last field can be left with the default value, unless you want to name it something else.

Click 'Go' and you should be left with a new EMO file, which we can view in the Asset Explorer:


Our model fits right in and doesn't have any messy shadows for nonexistent objects anymore. Mission accomplished!

Unfortunately, you can see that her hands still have darkening, which creates a seam next to our modified object, but using your newly found AO mapping expertise, I'm sure you can fix it on your own. ;-)

That's it. Good luck, share your work and ALWAYS MAKE BACKUPS!

Monday, September 19, 2011

SSF4AE - doshu's ULSM Tutorial

Here's a more or less basic tutorial about how I built my Ultra Light Stage mod. The aspects that I won't cover are basic Gimp/Photoshop manipulations, building your own BGM selection and how to convert a TRN stage to any other stage. If need be, those aspects can all be learned quickly either by reading the SSFIV/AE wikis, by searching the net, or simply by thinking on your own and doing try/errors.
Also, the first part of the tutorial is way more detailed (both in text and pictures) than the last ones, since I wrote it a while back to explain how the Training stage edit works on the polycount forums.

Since I build my mod, a lot of progress has been made in the field of custom Training stage's templates, so instead of blindly followind this tutorial entirely, you should probably just take the parts you need and try to build even better stages than I did (not so hard IMO :p).

Finally, I have to insist that I'm (or was) a total n00b in modding, and that this tutorial might include some really weird and/or not efficient methods for expert modders. I'm repeating myself here, but better safe than sorry^^. Anyway, if you have a better way of doing things, share it! This tutorial will then hopefully be updated ;).

Ok, let's start with an overview of the needed tools (find those in the wiki and/or with google) :

  • SF4 Assets Explorer
  • The Gimp + dds mod
  • SFIVAM
  • hexadecimal editor HxD
  • Ryu's Classic Training Stage mod by hunterk
Quick overview of the whole process :
  • extract Ryu's Classic Training Stage's dds and observe how it's made
  • build your own dds from whatever art you find that seems fine (but do not forget to get the author's authorization if you want to share your work!)
  • do the hex magic
  • inject the dds : the stage is done!
  • build the 3 preview pics'dds : big, medium and small size
  • build the 2 kind of presentation text : Stage Select and pre-versus screen
  • inject the whole thing into the appropriate files
  • mute that annoying announcer !
  1. Building your own stage
    1. Basic explanations
      Ok, so here's a bit of explanation on how it works. As you'll see, it really needs only basic picture editing skill, and not anything fancy.

      First, let's look at the "cube" limitations : the edges (this stage was done by hunterk).
      [IMG]

      As you can see, all the vertical sides of the cube are filled with the same part of the texture, making it "loop" when it reaches the end. The same with the floor/ceiling. In practice, it doesn't show that much, except when performing some Ultra's like Ryu's Metsu Shoryuken.
      But what is important here, is that because of that loop, the more the left and right sides of the texture looks alike, the less it will be apparent in the stage. In this case, it's almost "invisible".
      Secondly, here's the kind of file the stage's texture is made of:
      [IMG]

      Basically, the "floor" part is upside, then comes a thin black line, and the the main background. What is important here for "good" results, is that the floor looks as much as possible like one, as it does from all the above examples (and in the WIP preview screenshot). If the original jpg image's "floor" isn't "straight", or is filled with different objects and such, the result might be awkward (or not, it depends).

      For example, let's first show the results from the 2 pictures above:
      [IMG]

      All in all, except the crappy resolution problem, those stages look "good" : the floor is “floory”, and the edges of the texture look alike, so it should be pretty "invisible" while playing.

      Let's finish the basic explanations with a "difficult" file to work from (at least for my skills)
      [IMG]


      That's it for the basic explanations.
    2. Choosing some art and building a dds from it
      Basically, you'll want to work from a picture as high def as possible, even if the dds will only be 1280*800. Also, the scene should ideally be pretty empty in the “front”, thus allowing you to easily build the floor of your stage. It is possible to work from more difficult material, but I'll leave it to you to find how, explaining it here would be long and tedious.

      For my part, I worked mostly on feeling. Just look at the picture, copy whatever part you want to make the floor of without thinking too much about proportions, copy and paste it as a new image, then resize that new image at 1280*237. That's pretty much it for the floor.
      Return to the original picture, select the other part of it (Ctrl-I should do the trick if your previous selection was still active), copy paste as new image, then resize to 1280*553. That's it for the wall.
      Create a new black backgrounded 1280*800 image, copy paste the floor into it, position it up (using the arrows make it a breeze to do, no pixel precision needed). Do the same for the wall, except you position it down. There should be around 10 pixels left black in between.
      Flip the image horizontally (Image → Transform), then save as a .dds (just name the file whatever .dds when saving). Don't bother about the compression, it's not needed.
      Before injecting the newly created dds file, you need to make it the exact same size as the original one. To do that, just open both the original and the new dds file into your hex editor, and do the following :
      - on the original file : Ctrl-A ; End ; Ctrl-E ; choose 2EE080 ; Ctrl-C
      - on the new file : Ctrl-A ; End ; Ctrl-V ; Ctrl-S

      That should do the trick. Basically, you're copying what bytes are missing in the new file from the original one. All the files I created were always 2EE070 sections long, that's how you get the 2EE080 number. Should your file be a different size than that, you will have the adapt this number to that size so that both files are the same size at the end. This method doesn't work with new files bigger than the original though... (see how I'm a n00b in hex editing? Pretty n00bish I must admit, but it works! I have an idea why it does work, but I'll gladly hear some real explanation^^).

      A last word about applying filters on the dds befrore injecting it. The ingame look of the stage you built won't be exactly the same as the dds' look, so you might want to try and apply some filters. Here are the ones I used so far:
      - unsharpen: used mostly for high definition material, like most of the stage of the ULSM. I used it twice on each dds.
      - cartoon: used in combination with "Van Gogh" to make low definition material look ok-ish ingame
      Don't hesitate to try other filters too!

      Ok, you're good to inject to file into the .emz and test out your newly build stage!
  2. Editing the Stage Select screen
    [IMG]
    This part is really easy, but quite time consuming. I'll first specify the particularities of each kind of file needed for the Stage Select screen (dds resolution : actual picture resolution (ratio) / type of compression needed):
    - big preview picture: 1024*512 / 710*377 (1.88) / BC2/DXT3; the BLD stage needs a 1024*1024 resolution file (adapt the actual picture size accordingly)
    small preview picture: 128*128 / 116*89 (1.30) / BC1/DXT1

    Then the pre-versus screen:
    - medium preview picture: 512*256 / 336*214 (1.57) / BC1/DXT1; BLD, KOR, AFX need a 256*256 image, adapt the actual picture size accordingly

    And for the text in both screen (up left for the Stage Select screen, up right for the pre-versus'):
    - 256*128 or 512*128 / Comic Sans MS Bold 34 (Place) and Arial Bold 36 (Stage name) / BC2/DXT3

    To avoid you the pain of figuring out which stage's text needs which resolution, here's the list of the stages needing a 256*128 dds: AFR, RVR, AFX, VIE, JPN, VCN.

    Another time consuming task is figuring which files you need to edit, so here's the list:
  • \ressource\ui\stage_select\stage_select.emz: for every big/small preview picture and Stage Select screen's text. Finding the small ones is easy, since the entry name corresponds to the stage name. The big picture/text is much more difficult to find, so here's a list to help you out (pic/pic/txt/txt; I guess you have to inject the new pic and text twice, in both entries, I haven't tried to do it at only one place...):
        • BLD: I30 / I3E / I8A / I98
        • IND: I33 / I41 / I8D / I9B
        • KOR: I36 / I44 / I90 / I9E
        • AFX: I39 / I47 / I93 / IA1
        • LBX: I3C / I4A / I96 / IA4
        • USA: I3F / I4D / I99 / IA7
        • CHN: I42 / I50 / I9C / IAA
        • RUS: I45 / I53 / I9F / IAD
        • BRA: I48 / I56 / IA2 / IB0
        • AFR: I4B / I59 / IA5 / IB3
        • VIE: I4E / I5C / IA8 / IB6
        • JPN: I51 / I5F / IAB / IB9
        • EUR: I54 / I62 / IAE / IBC
        • SCO: I57 / I65 / IB1 / IBF
        • JPX: I5A / I68 / IB4 / IC2
        • LAB: I5D / I6B / IB7 / IC5
        • RVR: I60 / I6E / IBA / IC8
        • VCN: I63 / I71 / IBD / ICB
        • CNX: I66 / I74 / IC0 / ICE
        • BRX: I69 / I77 / IC3 / ID1
        • VNX: I6C / I7A / IC6 / ID4
        • TRN: I6F / I7D / IC9 / ID7
  • \ressource\ui\versus\versus\img#.emb.emz, where # is between 0 and 3: for everything pre-versus screen related. The entries are self explanatory, with JPN_name for the text part, and stage_JPN for the medium preview picture. Just take a look to find out which stage is where (the text and the picture entries can be in different files). Also, img3.emb.emz contains Boxer's name, so if you're using a JPN character's name mod, be sure to swap the original (Balrog) with is counterpart (M. Bison, to be found in some other file).
And finally, though I won't go through the hassle of explaining Gimp's image editing manipulations (a small hint about it though, be sure to use the game's original files as models for the shapes, especially for the small preview image; that way the result will fit perfectly into the game's screen), I'll throw a word about the halo thing around the text.
At first, I followed this tutorial. The result was good, but I came around a faster and better looking method after a while: follow all the steps until before applying the first Gaussian filter, then do a select all (CTRL-A), and apply directly a 10 point Gaussian filter. That way, you only have to apply one filter with one setting, removing the need to change the settings from 5 to 10 points every time. Finally, just follow the end steps of the linked tutorial.

Ok, now you're set, all that's left is to inject all of your files one by one into the game's files. A long and boring process if you're doing every stage at once, but the result is really worth it!
One last word about this part of the process: don't pay attention if the SF4 assets explorer preview looks messed up, it doesn't affect the in game result.
[IMG]

  1. Mute the announcer
    This is quite easy:
  • open \ressource\ui\sound\se\VERSUS_SE.csb with SSFIVAM
  • extract everything in a temporary folder ("unpack" command)
  • hexedit the files containing the sounds you want to delete by selecting all and replacing the data with zeros (listen to the files in AM beforehand, to found out the name of the sounds you want to delete)
  • then inject all the files inside the original file ("replace content with..." command)

    There may be a better way, but that one worked great for me^^.
And that's it for the ULSM tutorial!

SSF4AE - Swapping Static Objects with sloth86's Tools

Swapping static objects with sloth86's tools.
copyright sensibeat

sloth86's toolshttp://aemods.pbworks.com/w/page/42053948/aetools#Sloth86sModelSwapTools

piecemonteeSF4explorerV0.37b.exehttp://sf4viewer.sourceforge.net/

With this method you can only swap static objects assigned to 1 bone.

First chose a .obj you want to swap:


Chose a character and extract the full model as a .obj with sf4explorer:


You'll have to edit the model in your 3D editor to fit the character:


¤ More infos about that part here: http://filthypants.blogspot.com/2009/08/beginners-guide-to-sf4-model-editing.html

¤ To open the .obj in 3ds max you may need to open it and save it in misfit model 3d first.

Now you have your model in place save it and open EMG2SMD.exe:

I want to swap my cap with zangief's hairs (15th #EMG -as viewed in sf4explorer-)

Open the smd in notepad and look for the number of the bone you want to link your object to:

in that case I want to link to the "head bone": #6.

¤ More infos on smd here: http://developer.valvesoftware.com/wiki/Studiomdl_Data

Now you can use OBJ2EMG.exe:

¤ To use a .obj from 3ds max in OBJ2EMG you may need to open it and save it in misfit model 3d first.

Then use EMGSWAP.exe:


We aren't done yet, it needs some textures (diffusion+normal map dds):

¤ See other tutorials to add dds to your col.emb and nml.emb...

Then use DDSREFEDIT32.exe (I renamed former new.emo to ZGF_01.obj.emo before this step):


That looks OK in sf4explorer:


Let's test in game:


edit:
I thought the bone ID# was in hexadecimal in the smb... it's in decimal sorry for the confusion, I erased that part.
You actually need to write it in hexadecimal when you do it manually, we'll see that in another tutorial...

edit 2: I knew I forgot something...

I didn't linked any material features in the .emm to my "mcap"

2 ways to do it:
1) the lazy way: edit the obj.emo in hexadecimal and change "mcap" by a material that could do the trick like "shoes" or "pants"

2) using NanjouJ's matedit tool, replacing an unused material (in that case "hair") by "mcap" and the features you want to use on it.
http://aemods.pbworks.com/w/page/42053948/aetools#NanjouJsMaterialsTool
UPDATE: use sloth86's EMMEdit instead. It's much easier.

Here's the final result with material features added (no more weird reflections):

Thursday, August 25, 2011

Intermediate Guide to SF4 EMG (Model) Swapping

Sloth86 has cracked model manipulation in SF4 wide open. It's now possible to swap models from character to character and costume to costume in a fairly consistent manner, thanks to sloth86's research. Additionally, he was nice enough to write simple, straightforward graphical tools that extend this ability to almost anyone. Just to be clear, though: this procedure often produces strange results, especially with respect to animations. Sometimes these results can be fixed through model editing, sometimes not.

In this tutorial, we're going to use sloth86's methods to take an EMG model from one character and replace it with an EMG model from another character.

First things first, lets get all of the tools we'll need. This is a pretty advanced procedure, so we're going to need piecemontee's SF4Viewer (aka, Asset Explorer), Kensou's Tool(s) and Sloth's tools, specifically, EMGSwap and DDSREFEDIT. Once you have those tools downloaded and organized, we're ready to get started.

First, identify which model you want to move and where you want to put it. I'm planning to take Guy's head (donor model) and place it on Ryu's body (recipient model).

Once you've got it all planned out, open both models (for me, GUY_01.obj.emo and RYU_01.obj.emo) in the Asset Explorer and find the desired objects--in my case Guy's 8th EMG (counting each model, starting from the top in the Asset Explorer's display)--and I'm going to replace Ryu's 12th EMG. The recipient's numbers are important, so write it/them down.
Now, select the donor object, right-click and choose 'Raw dump,' name it something informative (I chose face.emg) and click 'save.'
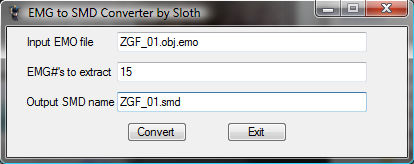
Next, armed with our model files and numbers, place both the donor *.emg file and recipient *.obj.emo file into the same directory as EMGSwap and double-click on EMGSwap to run it.

This window should pop up:
In the field labeled "Input EMO file," type the name of the recipient model, in my case RYU_01.obj.emo. Then, in the field labeled "EMG # to swap out," type the number of the recipient model you wish to replace, in my case 12 (for Ryu's 12th EMG model, the face). Next, in the field labeled "EMG file to swap in," type in the name of our raw-dumped donor model, in my case face.emg. Finally, in the field labeled "Output EMO file," we'll just leave the default 'new.emo' for now (we'll rename it to replace the old model later, but in the meantime, we don't want to mess anything up before we're sure it's cool).
Click 'Go' and cross your fingers. If all goes well, you should see a window like this pop up:
Looks good so far.

Now, lets check out our Frankenstein's monster by opening the 'new.emo' file in the Asset Explorer:
Yeesh, looks pretty freaky. Since Guy's head was sized and positioned significantly differently from Ryu's, we're going to have to change some things up to make it look normal again.

So, still in the Asset Explorer, lets select our newly imported model, right-click and choose 'Extract...' from the menu. Name it something informative--like face.obj--and click 'save.'
At this point, you might be asking yourself, "if I'm extracting and converting into an obj anyway, why didn't I just export from Guy's model and import straight into Ryu's model in the Asset Explorer, skipping all this EMGSwap bullshit?" Well, smarty-pants, most files in AE (including the *.obj.emo files we're messing with right now) include an index that includes the location and size of each and every file contained within. The Asset Explorer uses this index to determine what can and can't be extracted/injected safely.

However, sloth86's EMGSwap tool rewrites this index for us, so the Asset Explorer can safely extract/inject our borrowed models once EMGSwap has done its thing. Perhaps someday that same functionality will be integrated directly into the Asset Explorer (it's open source, after all), but that day is not today.

Anyway, so we've gotten our model swapped in, but it looks like crap and we'll need to use model editing to fix it. I'm not going to spend a lot of time on this part, since you should already know about model editing enough to fix things yourself. For me, Guy's head was the wrong size, so I needed to enlarge it and move it around a bit. I really should edit Ryu's neck to meet the head, too, but you get the idea...
Alright, with my edits in place, the model looks okay, but you'll notice that the skin looks all white and pasty. That's because it's looking to Ryu's first DDS texture, which corresponds to--you guessed it--his duffel bag. This is actually convenient for my purposes, since I can just replace the duffel texture with my donor texture. Thus, I won't need to edit a bunch of DDS references using sloth86's DDSREFEDIT tool, but you probably will (hence, why I included it in the tools you'd need to download).

I'm only going to use it a little, but I'll try to tell you more about it when the time comes.

In the meantime, we need to create some new texture and normal map containers to go with our new model. To do it, we'll use Kensou's sf4tool, just like in this earlier tutorial I made.

Open your donor's *.col.emb and *.nml.emb files in the Asset Explorer, find the textures that correspond to your donated model, right-click and choose to 'Extract...' them. Name them something informative (I used 'Guy.dds' and 'Guynmap.dds') and click 'save.'

Next, open your recipient's *.col.emb and *.nml.emb files in the Asset Explorer an extract *ALL* of his or her DDS textures. Be sure to name them something informative so you can remember which order they're stored (1.dds, 2.dds, etc. and 1nmap.dds, 2nmap.dds, etc. work well).

Now, as per the aforementioned tutorial, create new *.col.emb and *.nml.emb files with your donated textures in the first position. (I actually replaced my recipient's first textures, so the order for mine was Guy.dds, 2.dds, etc. and Guynmap.dds, 2nmap.dds, etc.) EDIT: I used the first position, but apparently the *last* position is more likely to work...?
At this point, you would run the DDSREFEDIT tool and input the number '0' into the 'new texture map' field and '1' into the 'new normal map' fields (assuming your recipient only had a single texture to begin with; this isn't the case with shoto original costumes, though, so count the textures if you need to, according to the instructions in the program; I had to use '5' for the normal map number), your modified *.obj.emo file in the 'Input EMO file' field, and the number of your recipient's replaced model in the EMG # field (in my case, it was '12'). You would then check the box for '+1 to every other normal map references' (this last bit was unnecessary for me because I replaced the duffel bag normal map with the donated normal map).

This was my result:
Anyway, if this last part seems confusing, don't worry about it. I'll be making another tutorial that goes over the texture reassignment tool using a more typical example in the future. In the meantime, try your best, share your work and ALWAYS MAKE BACKUPS.

Cari Farmasi

Farmasi Di Kuala Lumpur dan Selangor Selangor / KL Area NO SHOPS NAMES ...