Monday, January 24, 2011

BSNES on Older Distros, such as Lucid and Squeeze

In addition to being on the forefront of SNES emulation, BSNES also utilizes cutting-edge programming techniques to maintain the cleanest, most easily readable code possible. Unfortunately, that means that older distros--even ones that are still well within their supported lifespan--may get left out in the cold.

However, BSNES forums user Themaister has done us all a favor and backported byuu's cutting-edge C++0x code to use the more widely supported C++98 standard, which allows it to be compiled on any version of GCC from 3.x on up. The only catch is that his work only applies to libsnes, the modular emulation core of BSNES in library form, so byuu's official Phoenix GUI is still off limits, as is his libsnes-driven Qt GUI.

Thankfully, Themaister has us covered here, too, by offering SSNES, his super-slim CLI-only interface to libsnes. Just like his C++98 port of libsnes, SSNES can be readily compiled with even extremely old versions of GCC, so any semi-modern distro should be able to use it just fine.

My PPA now contains Lucid packages for both libsnes (all three official cores, plus an snes9x-based core for legacy machines) and SSNES, which should also (hopefully) work on Debian Squeeze.

A few things I'd like to point out about SSNES:
1. It will accept a variety of audio drivers, including jack, which allows ultra-low latency :D
2. My package was built using dynamic libsnes linking, so it requires a libsnes package from my PPA to function
3. In addition to accepting BSNES-style XML shaders written in GLSL, SSNES will also accept shaders written in Nvidia's Cg language if you install the nvidia-cg-toolkit package
4. The default configuration file for SSNES is located at /etc/ssnes.cfg, but you can override this by placing another config file in ~/.config/ssnes

As always, let me know if you run into any problems with these packages.

Thursday, January 20, 2011

Crimson Echoes and Flames of Eternity

These two ROMhacks for the legendary SNES RPG Chrono Trigger were just leaked on Reddit the other day and I happened across some bsnes-compatible UPS patches, which you can download here. (I didn't make these patches, btw, and I didn't upload them)

I haven't played through them yet, but they seem to work fine from what I've seen. They will get past the initial intro sequence and into the playable game, but I haven't tested any further than that.

They were tested with an unheadered Chrono Trigger ROM that had been run through snespurify.

I'll update this post with anything interesting I find in my playthrough.

Sunday, January 16, 2011

Cheesy Garlic Bread خبز الثوم المحمص بالجبن

Cheesy Garlic Bread خبز الثوم المحمص بالجبن

Scroll down for English post
هذا الطبق هو أحد أفضل المقبلات بالنسبة لي، وهو سهل، لذيذ، وسريع التحضير، في الغالب يتم تقديمه في العديد من المطاعم كأحد المشهيات. يمكن عمله باستخدام الخبز الفرنسي أو الإيطالي أو أي نوع مفضل أو متاح، قمت باستخدام الزعتر الجاف في هذه الوصفة فمذاقه رائع مع الخبز، قمت أيضا باستخدام الزبد ويمكنكم استخدام زيت الزيتون بدلاً منها.

نصيحة الوصفة:
1- يمكنكم استخدام أي نوع تفضلونه من الجبن (استخدمت جبن الإمونتا)، ولكن إذا كان الجبن مالح أو قديم لا تضيفوا ملح ولا تستخدموا الزبدة المالحة.
2- يمكنكم شوي الخبز على الجريل أو التوستر بدلاً من استخدام الفرن.
3- يمكن استخدام بودرة الثوم بدلاً من الثوم الطازج وفي هذه الحالة يتم استبدال كل فص ثوم بثمن ملعقة شاي بودرة ثوم.

الوصفة تكفي: 7 شرائح خبز
وقت التحضير: دقيقتان
وقت الطهي: 10 دقائق
This is one of my best yummy appetizers, so easy, delicious, and super quick. It's being served in many restaurant as an appetizer. You can make it from fresh or left over French baguette or Italian bread, or any kind of bread you have or prefer, I used dried thyme in this recipe, it tastes grate with it, I also used butter, you can use olive oil instead.

Recipe Tips:
1- You can choose any type of cheese you like (I used Emmental cheese), but if your cheese is salty or sharp, don't use salt or salted butter.
2- You can grill it instead of using the oven.
3- You can use garlic powder instead of fresh garlic, in this case substitute 1/8 tsp powder for every clove of garlic.

Serves: 7 slices
Prep time: 2 minutes
Cooking time: 10 minutes

Click here for the recipe اضغط هنا للوصفة »

Saturday, January 15, 2011

Setting Up Pbuilder To Act Like Launchpad Build Farm

I build a lot of packages for my Launchpad PPA and I use a number of different systems to do it, so I find myself needing to set up pbuilder environments to test my build procedures pretty often. Unfortunately, documentation for this procedure is often out of date and/or goes into a lot of strange details and edge-cases that are unrelated to me, so I decided to write down my steps for future reference.

Here's what I do:
1. Install pbuilder and some other handy packages
Open up a terminal and type:
sudo aptitude install pbuilder debhelper devscripts build-essential
2. Tell the pbuilder environment that it is going to act just like the Launchpad build farm
Still in our terminal:
sudo pbuilder create --debootstrapopts --variant=buildd
This one takes a while because it's basically installing an entire system inside your existing installation, so grab a cup of coffee and watch the messages fly by.

3. Give it access to all official Ubuntu repositories
By default, your shiny new pbuilder environment won't have access to a lot of packages, so we'll want to add mirrors for common Ubuntu packages, as well as our own PPA to the pbuilder configuration file. So, still in a terminal, type:
nano ~/.pbuilderrc
and paste in:
OTHERMIRROR="deb http://archive.ubuntu.com/ubuntu [YOUR UBUNTU VERSION] main restricted universe multiverse | deb http://archive.ubuntu.com/ubuntu [YOUR UBUNTU VERSION]-backports main restricted universe multiverse | deb http://archive.ubuntu.com/ubuntu [YOUR UBUNTU VERSION]-security main restricted universe multiverse | deb http://archive.ubuntu.com/ubuntu [YOUR UBUNTU VERSION]-updates main restricted universe multiverse"
and we'll also pipe on a section for our PPA, so we can use our own packages as dependencies, which in my case looks like this:
| deb http://ppa.launchpad.net/hunter-kaller/ppa/ubuntu maverick main
4. Make our pbuilder trust packages from our PPA
First, we'll login to our pbuilder environment:
sudo pbuilder --login --save-after-login
Then, we'll give it the public key to our PPA, just like if we were adding it to our own keyring:
apt-key adv --keyserver keyserver.ubuntu.com --recv-keys [YOUR PUBLIC KEY HERE]
If all goes well, you can leave your pbuilder environment by typing:
exit
5. Update our environment with these new packages
Still in our terminal, type:
sudo pbuilder --update --override-config
This should get you in pretty good shape. Let me know if you run into any issues.

Tuesday, January 11, 2011

Bloom Pixel Shader for bsnes

I did some digging around online and came across some bloom filters written in GLSL. The one on this site looked the best to my eyes, so I converted it to work with bsnes and tweaked the settings a bit to achieve the desired effects.

What I found while playing around with it is:
1. Turning on 'Smooth video' seems to amplify the bloom effect.
2. The same amount of bloom looks different on each game, depending on the overall dark/light-ness of the game.
3. Combining excessive bloom with bsnes' scanline filters can make a pretty decent approximation of a CRT. While this is in no way as accurate or as nice looking as cgwg's CRT shaders, it may be an option for the many people whose video cards don't have enough horsepower to handle that complex shader.

First, I made a simple, fairly subtle (as far as bloom is concerned...) shader, which looks like this:
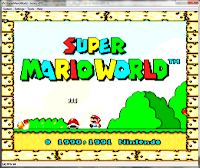
Looks pretty nice, eh? Unfortunately, the exact same shader settings look awful in Super Mario World:
One big flare-out... All I need is some brown and lens flare and I'll have next-gen graphics.

However, if you add in a scanline filter, things can really get evened out. In fact, you can use the different scanline intensity filters on a game-to-game basis to attenuate the inconsistency of the bloom effect. For example, here's a shot of Super Mario World with even more bloom added and 'smooth video' checked, but with 100% scanlines to chill things out a bit:
As you can see, it kinda gives it a plasticy, oversaturated look, but it's sort of charming, if you ask me.

In contrast, those exact same settings in Chrono Trigger--an altogether darker game--produce a really nice CRT-style effect, like this:
As you can see, even the bright parts don't suffer from excessive flare-out and the color bleed into the scanlines from the bloom provides an effect that is reminiscent of the phosphor glow on a CRT display.

One more shot of Chrono Trigger, this time using heavy bloom, 25% scanlines and smooth video:
I have asked WhateverMan if he would release his shader code under a permissive license. If he does, I will post my simplebloom and heavybloom versions here for download.
Update (1/19/11): WhateverMan was nice enough to allow his work to be distributed/modified under the GPL, so you can download the heavybloom shader here and the simplebloom shader here.

Update (2/2/11):
I also made a simple scanline shader that works with or without video smoothing:
For best results, use it along with a scale factor of 4x. Otherwise, the pixels won't line up with the scanlines correctly.

UPDATE (2/28/11): I made a scanline shader that works with a 3x scale factor, as well. You can download it (and the other GLSL shaders) here.

Egyptian "Koshari" طريقة الكشري المصري بالصور

Egyptian "Koshari" الكشري المصري

Scroll down for English post
في الوصفة السابقة تكلمنا عن طبق مصري للإفطار والعشاء، أما اليوم سنتكلم عن أحد أشهر أطباق مصر للغداء وأحياناً العشاء. الكشري المصري، من أكثر الأطباق المحبوبة هناك والتي يجب أن تتذوقها عند زيارتك مصر، فهو طبق لذيذ جداً، نباتي، وسعره في متناول الجميع كما أنه مفيد جداً في نفس الوقت. هذا الطبق يتكون من الأرز والعدس الأسمر (عدس بجِبَّة) والمكرونة والبصل المقلي المقرمش والحمص، بالإضافة إلى نوعين من الصوص وهما صلصة الطماطم ودَقَّة الثوم، اليوم سوف أضع طريقتين لدقة الثوم أحدهما نيئة والأخرى تطهى على النار، يمكن استخدام أيهما ولكنني أفضل النيئة أكثر فأنا أحب طعم الثوم الظاهر فيها فهو أكثر ما يميزها. يؤكل الكشري المصري حار غالباً ويعتبر الكمون من التوابل الأساسية المستخدمة في الدقة والصلصة.

نصيحة الوصفة:
1- لعمل بصل مقرمش ولذيذ يقطع البصل شرائح رفيعة ويوضع في الزيت الحار في إناء عميق بحيث تكون كمية البصل كافية فقط لتغطية وجه الزيت ليس أكثر إطلاقاً، يمكن أيضاً وضع شرائح البصل في الدقيق وتصفيته جيداً قبل وضعه في الزيت، وإذا كان متاح لديكم ترمومتر الطعام أو إناء القلي الكهربائي يفضل أن تكون درجة حرارة الزيت 177 درجة مئوية أو 350 فهرنهايت.
2- يجب متابعة البصل جيداً فهو يأخذ وقت طويل للنضج ولكن مع ذلك يمكن احتراقه بسرعة جداً، بمجرد أن يتحول لون البصل للون الذهبي يجب مراقبته وإخراجه من الزيت ولونه بني قبل أن يتحول لونه إلى أسود غامق فذلك يعني أنه احترق، أما في حالة إضافة دقيق نخرجه من الزيت ولونه ذهبي.
3- عند تسخين الثوم في الدقة أو الصلصة لا يصل الثوم لدرجة النضج أي يجب عمل خطواته بسرعة دون أن يصل الثوم للون الذهبي.
5- يمكن استبدال الطماطم بربع كوب معجون طماطم.

الكمية تكفــــي: 3 أشخاص
وقت التحضير: 5 دقائق
وقت الطهــــي: 30 دقيقة
Last time I presented an Egyptian dish for breakfast or dinner, and today I'm going to talk about the most famous Egyptian dish for lunch or sometimes dinner, "Koshary" is one of the most lovable dishes that you "must try" when visiting Egypt, because it's delicious, vegetarian "vegan", affordable for all and so healthy at the same time, this dish consists of rice, brown lentils "Ads Be-Gebba", macaroni, crispy fried onion, chickpeas, besides two types of sauces, tomato salsa and "da-ah" which is a garlic light hot sauce and for this one I'm going to add two recipes, one that is being cooked on heat, and another that doesn't need to, and I prefer the last one because it has that taste of raw garlic and that's what I really love about it. "Koshari" is usually hot and cumin is a main spice in its sauces.

Recipe Tips:
1- For crispy delicious onions, it should be thinly chopped, and put it in hot oil in a pot with good amount of vegetable oil, and the onion should be just enough to nearly cover the top of the oil, you can also use flour to coat the onion with and shake off the excess well before placing in the oil, if you there is a thermometer available or you're using an electric deep fry the oil better to be heated to 350F.
2- You should keep an eye on the onion, it takes some time to be cooked but it burns so quickly though, so once it's golden brown becarful and remove it once brown, if it's dark black that means it's burned, in case you use flour you should remove it once golden brown.
3- When heating garlic in the beginning of each "da-ah" and tomato salsa, you should make sure that the garlic is not cooked or turned to golden color, you should make the steps quickly.
5- You can substitute tomatoes with 1/4 cup tomato paste.

Serves: 3 people
Prep. time: 5 minutes
Cooking time: 30 minutes
Click here for the recipe اضغط هنا للوصفة »

Saturday, January 1, 2011

Added NEStopia to my Ubuntu PPA

I added packages for the latest Linux port of the awesome NES emulator NEStopia to my PPA. The only problem is that I don't know how to make a package create a ~/.[appname] config directory and/or put required config files into that directory at first run. If anyone knows how to do that, I'd appreciate the info. EDIT: Ok, I fixed it. I created a quick-and-dirty bash launcher script that will check for the required directory and file and create them if needed.

NO LONGER NECESSARY:
Unless/until I find out how to do that, anyone wanting to use my package will have to manually create the config directory and at least create a husk of an inputs file by opening a terminal and typing:
mkdir .nestopia ; touch .nestopia/nstcontrols
From that point on, everything should work fine. If you are super-scared of hitting the terminal and would feel better with a script, you can download and run this script and it will take care of it for you.

Let me know if you run into any issues or have any questions.

Cari Farmasi

Farmasi Di Kuala Lumpur dan Selangor Selangor / KL Area NO SHOPS NAMES ...